Putting your AI Agent on your website
The Website channel puts a chat on your own site: visitors write from the page they are reading, your AI Agent answers right away, and the conversations land in the same inbox as Facebook and Zalo. Create the chat in Repio, copy one line of code, paste it into your site. No programming needed.
On this page1/11 · Before you start
- 1Before you start
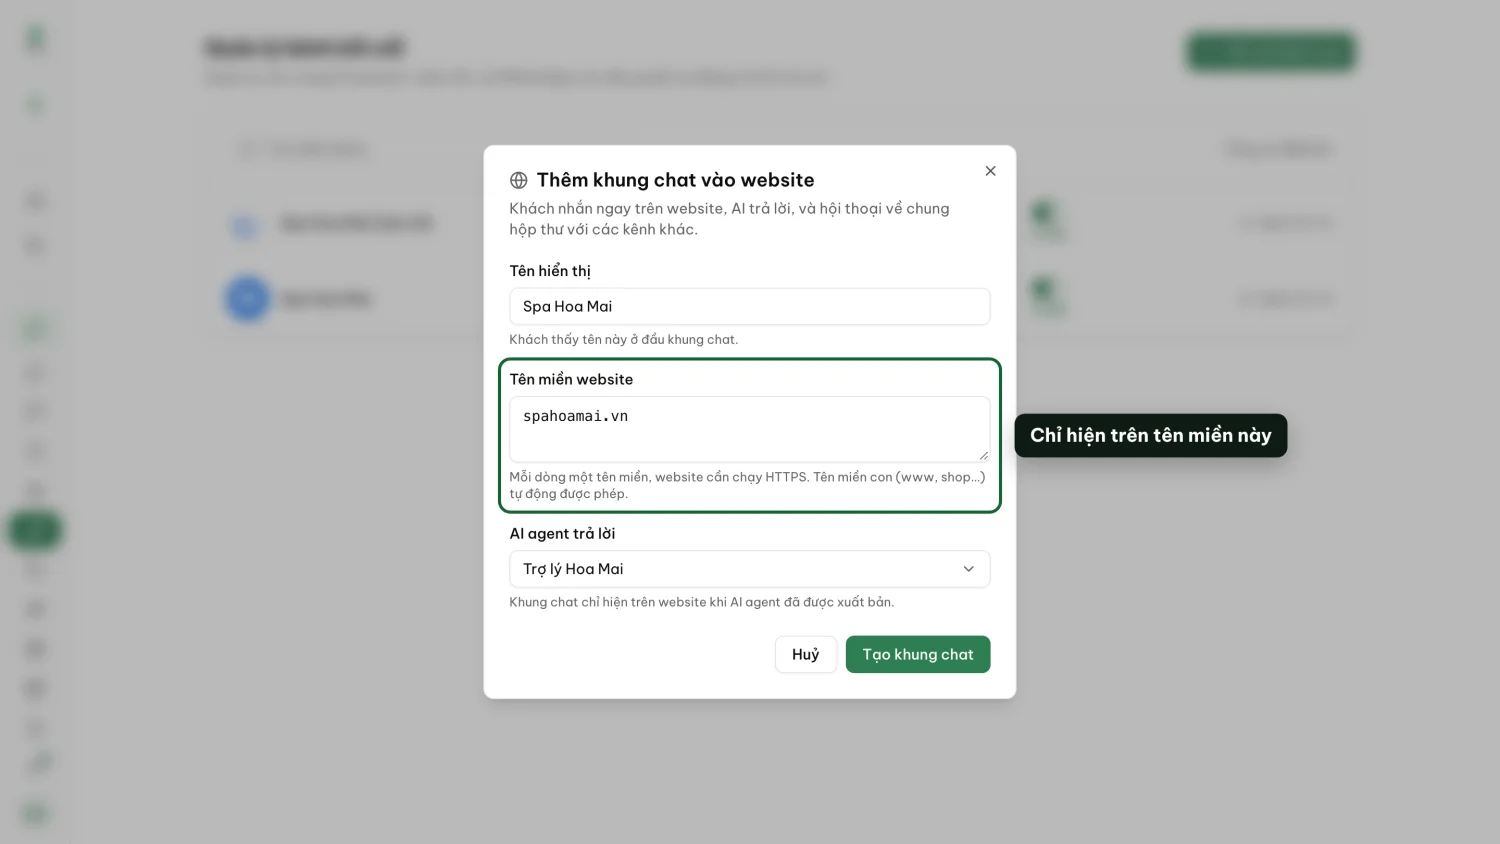
- 2Step 1: Create the chat in Repio
- 3Step 2: Paste the code into your site
- 4Where to paste it on common platforms
- 5Not a developer? Let an AI install it
- 6Step 3: Check that it works
- 7Customizing the look and the greeting
- 8Opening the chat from your own button
- 9Why the chat is not showing on your site
- 10The badge says Live, but the site shows nothing
- 11Website conversations in the inbox
Do these first
This only works once you have finished the following:
- 1
How AI Agents work: The chat only shows on your site once the agent behind it is published. Create, test and publish an agent first.
Key terms
- Website chat (widget)
- The round chat button in a corner of your site. Visitors click it to open a conversation with your AI Agent.
- Install code (snippet)
- A single
<script>line carrying your chat’s own id (it starts withwc_). Paste it into your site and the chat appears. - Website domains
- The sites the chat is allowed to show on. Anywhere else it stays hidden, even with the code pasted in.
- A published AI Agent. You can pick a draft, but the chat stays hidden until that agent is published.
- Your site runs on HTTPS (its address starts with
https://). Almost every site does today. - Access to edit your site, or the person who looks after it for you (a web agency or developer). All they need to do is paste one line, about five minutes of work.
Fill in the Display name.
Visitors see it at the top of the chat. Use your shop or brand name (for example Lotus Spa).
Pick the AI agent that replies, then click Create chat.
Unpublished agents are marked (draft). Repio then opens the new channel’s page with “Your chat is ready. Paste the code below into your website and you’re done.”
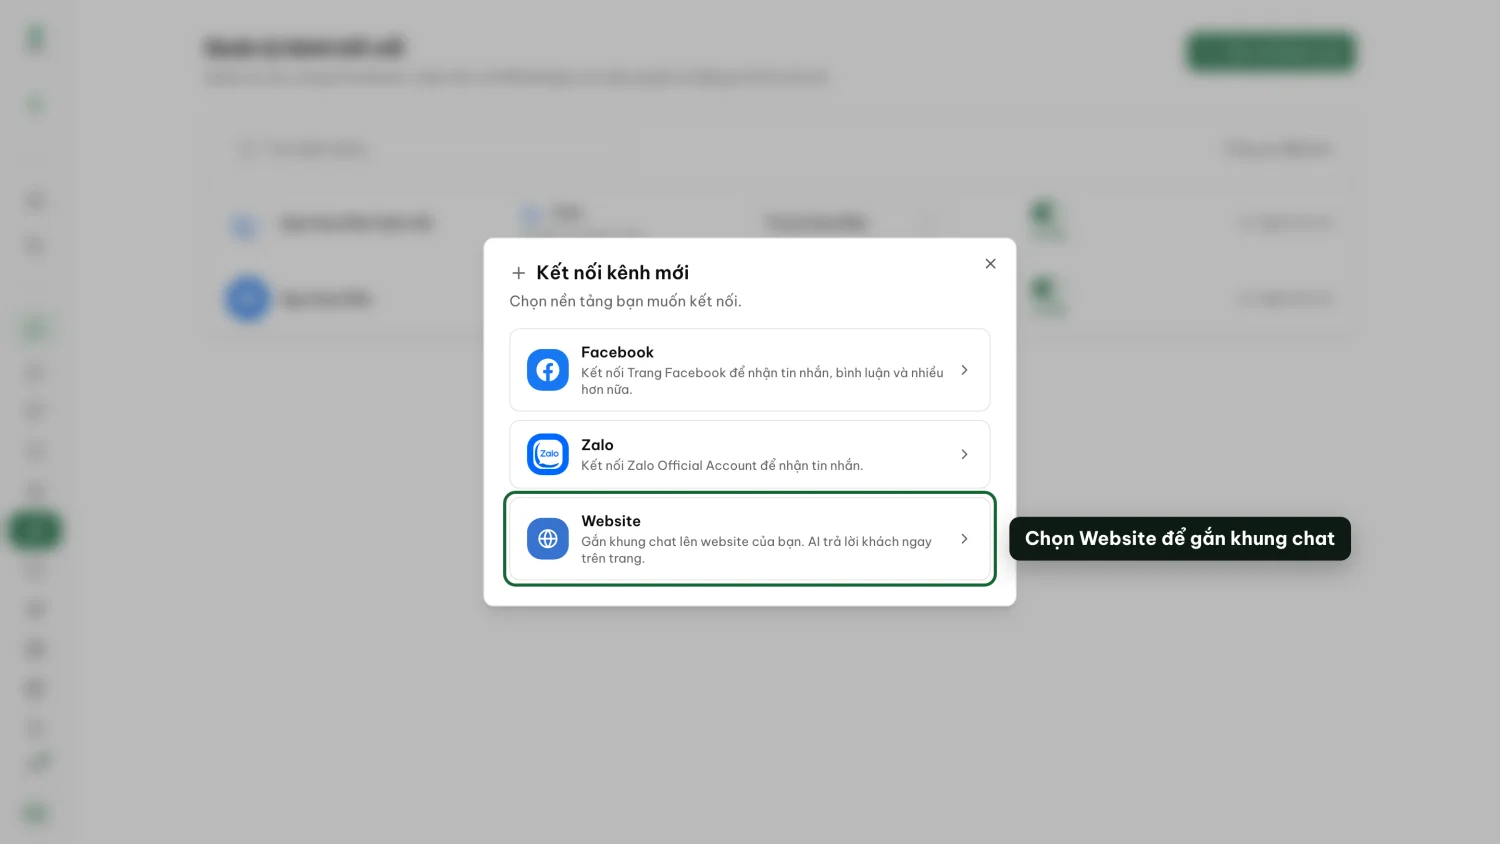
On the channel’s page, the Install on your website card holds your code. Click Copy code, then paste it once, just before the </body> tag, somewhere that applies to every page of the site (usually the footer or the shared layout).
It looks like this:
<script src="https://app.repio.io/widget.js" data-repio="wc_xxxxxxxxxxxxxxxxxxxxxxxx" async></script>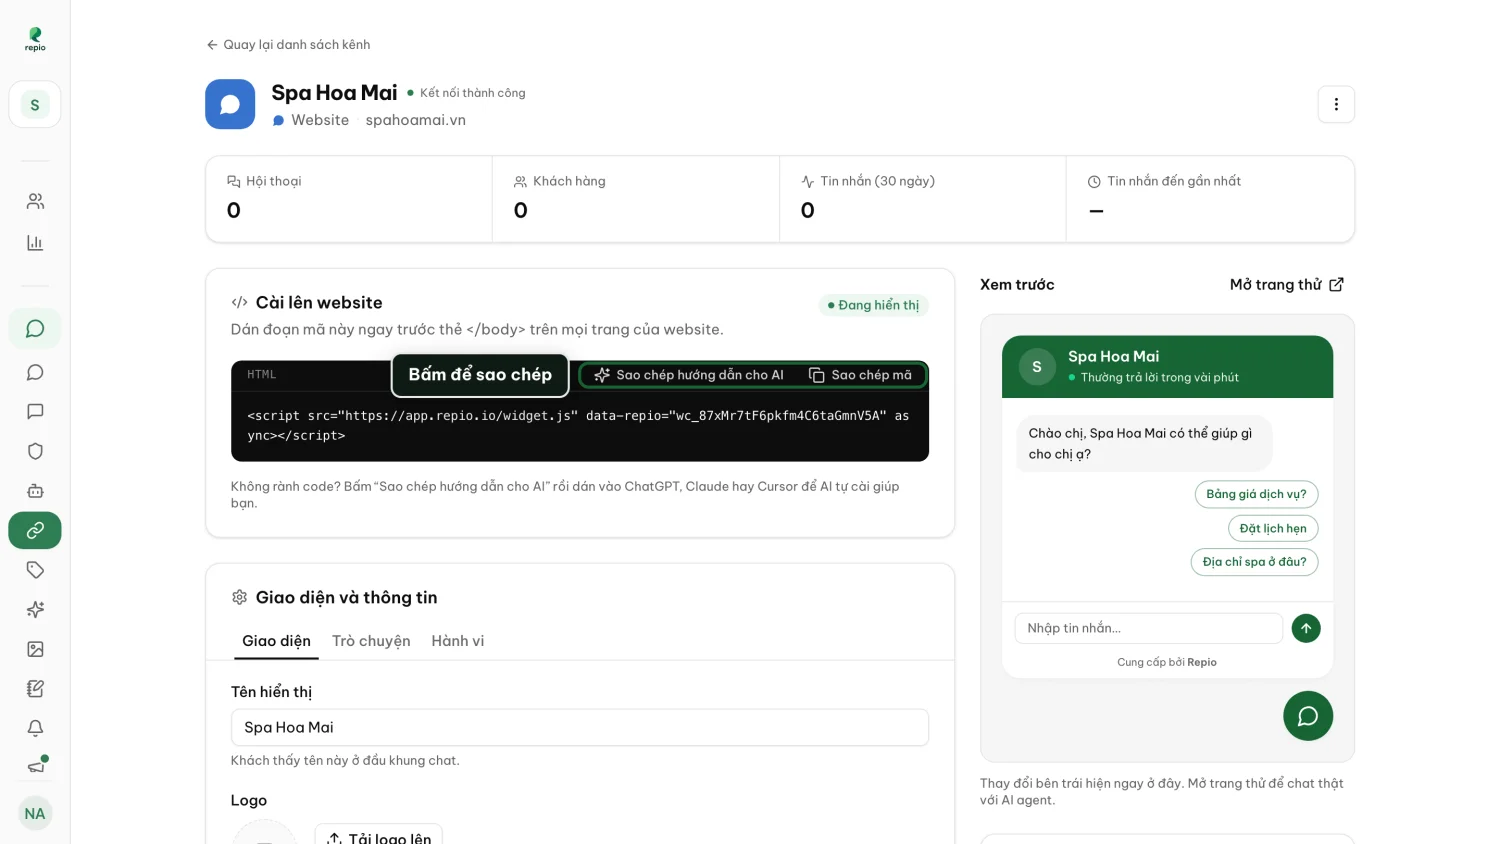
Note: Always copy the code from your own channel in Repio. The one above is only an example, and wc_xxx… will not work. Paste it as is: leave src and data-repio untouched and keep async.
| Platform | Where the code goes |
|---|---|
| Hand-built site (HTML) | Just before </body> in the shared template (e.g. index.html, footer.php). If every page is its own file, paste it into each. |
| WordPress | Install a header/footer code plugin (e.g. WPCode) and paste it into the Footer box. Or put it in the theme’s footer.php, before </body>. |
| Shopify, Haravan | Open the theme’s code editor, open theme.liquid and paste it just before </body>. |
| Wix | Go to Settings → Custom Code, add the code, apply it to All pages and place it in Body - end. Wix only allows this on a paid plan with your own domain. |
| Landing page builders (LadiPage…) | Use the page settings’ custom code (HTML/JavaScript) box. Register the page’s exact domain, including a free one the builder gives you (e.g. yourname.ladi.site). |
| Next.js | In app/layout.tsx (or pages/_document), use the Script component from next/script with strategy="afterInteractive" and the same src and data-repio. |
Tip: Menu names shift a little between versions of each platform. The rule never changes: paste it once, somewhere that covers every page, as close to the end of the page (before </body>) as you can.
Next to Copy code sits Copy instructions for AI. It copies a complete brief: your code, where it goes on each kind of site, your registered domains and how to check the result.
Paste it into ChatGPT, Claude or Cursor and let it do the install, or send it as is to whoever looks after your site. It has everything they need without a round of questions.
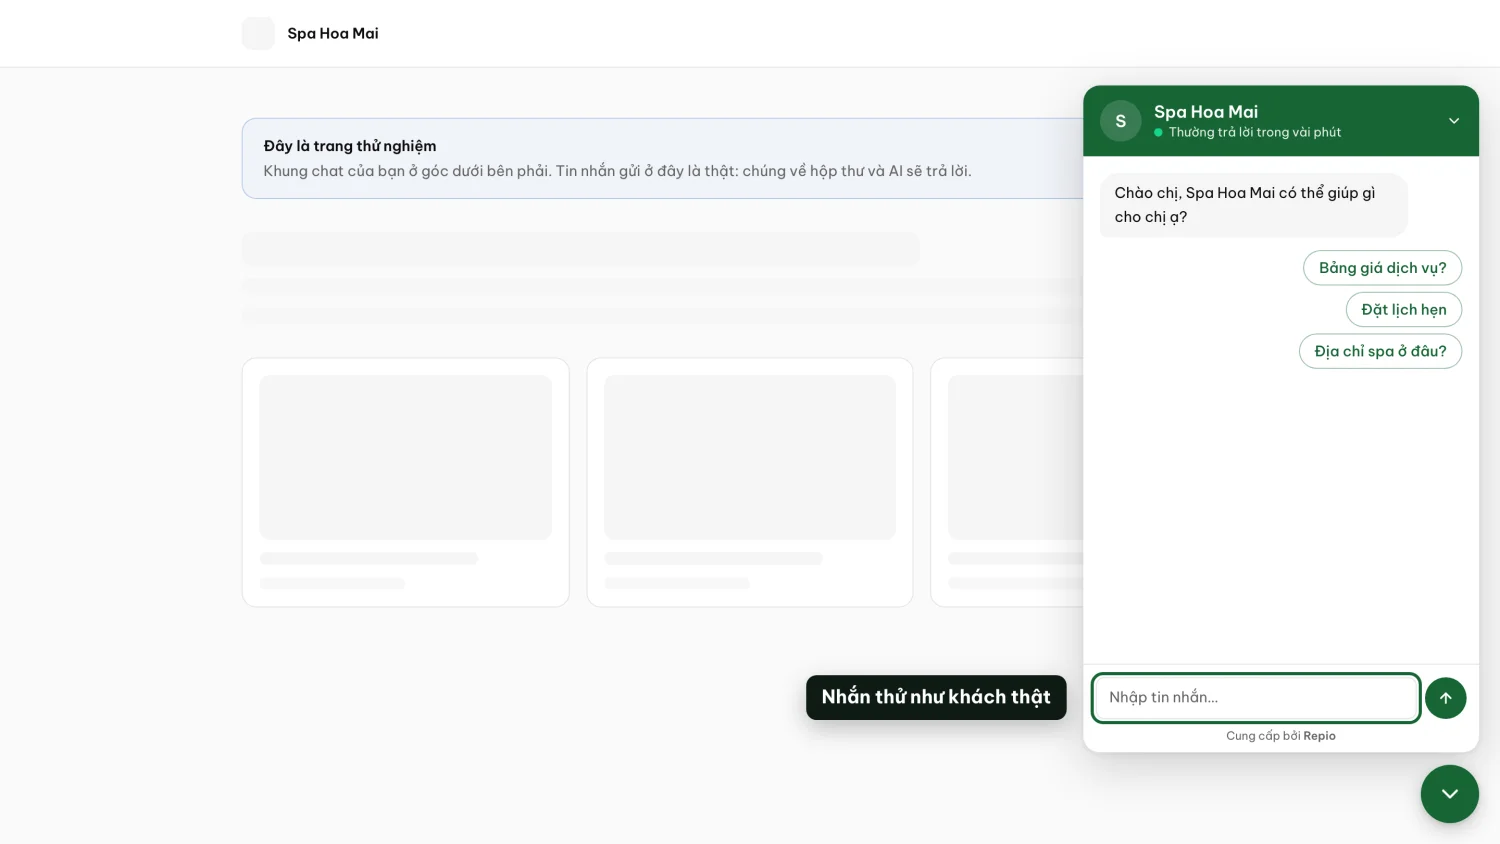
Open your site (reload the page) and look for the round chat button in the bottom-right corner.
If you moved the launcher, look in that corner instead. Click it, then ask a test question.
Open the Inbox in Repio to find the conversation.
Website visitors show up as Web visitor … until they leave a name. From here your team works the conversation like any other channel.
Tip: The badge on the Install on your website card is the quick check: Live means the chat is ready to show; Hidden means something is missing, see troubleshooting below.
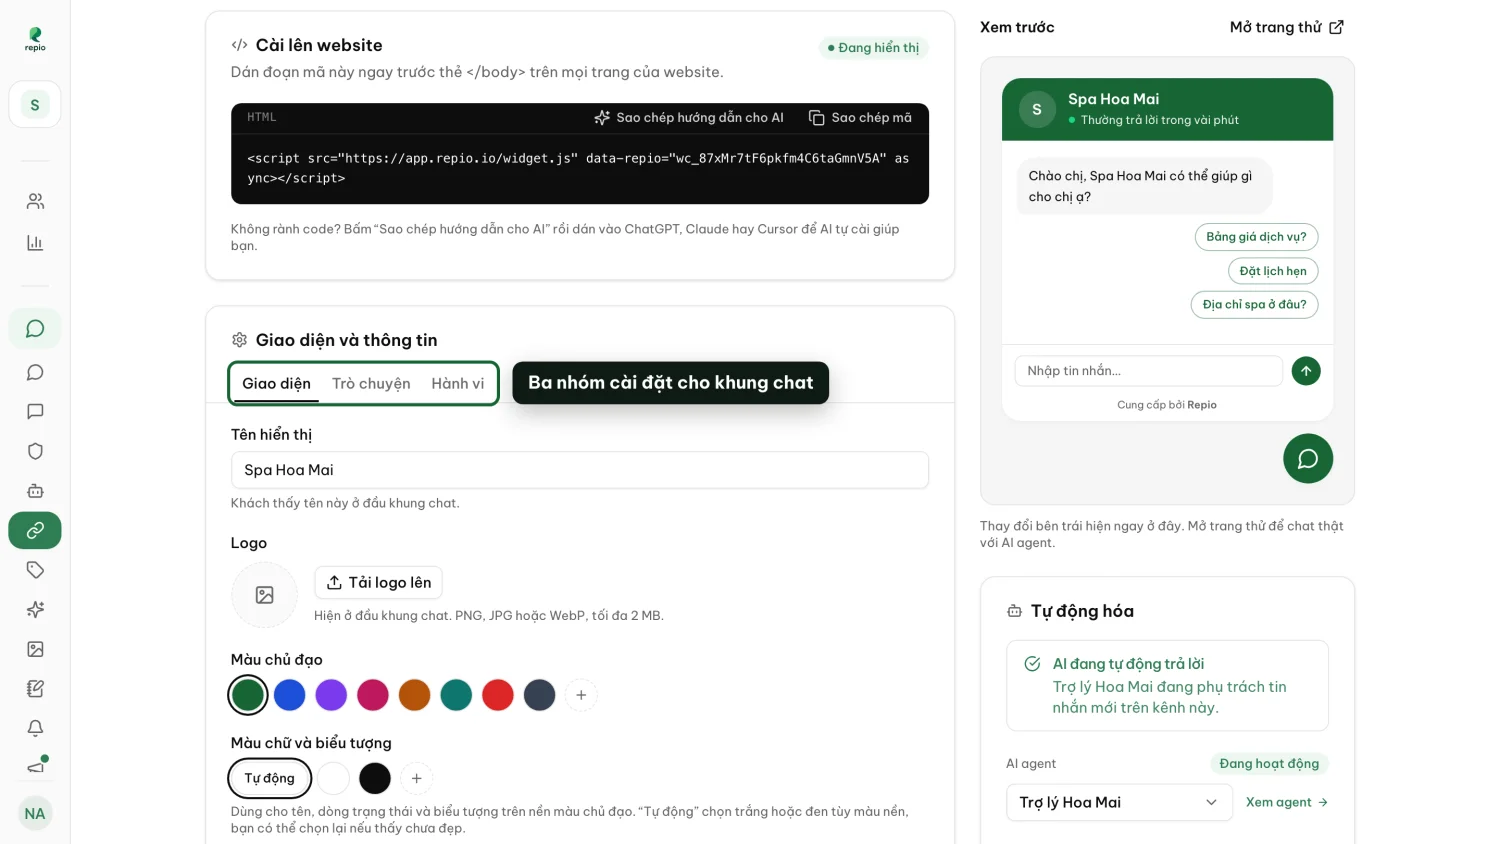
The Look and details card on the channel’s page has three tabs. Every change shows in the Preview on the right at once; click Save changes to apply it.
You never need to paste the code again after changing settings: your site picks them up within about a minute.
| Tab | What you can change |
|---|---|
| Appearance | Display name, Logo (PNG, JPG or WebP, up to 2 MB), Brand color, Text and icon colour (Automatic, White or Black) and Launcher position: bottom right, bottom left, or a custom distance from the screen edges (up to 1000 px). |
| Conversation | Greeting (the first message visitors see), Suggested questions (up to 4, asked with one tap) and Reply time (the small line under your name, e.g. Usually replies instantly). |
| Behavior | Website domains, Open the chat automatically when someone visits (on desktop) and Ask for details before chatting: name, phone, email. |
Tip: Turn on Ask for details before chatting and visitors leave their name and phone with their first message. It goes straight into your contacts, so the team can call back even after the visitor leaves.
If your site already has a button like Chat with us or Get a free consultation, it can open the Repio chat. The install code provides RepioWidget.open(), RepioWidget.close() and RepioWidget.toggle(). For whoever builds your site:
<button type="button" onclick="window.RepioWidget?.open()">Chat với chúng tôi</button>Check the badge on the Install on your website card first. When it says Hidden, the line underneath gives the exact reason:
- “Pick an AI agent for this channel under Automation below…”: no agent on the channel. Choose one in the Automation card on the right.
- “This channel’s AI agent is still a draft…”: the agent is assigned but not live. Open it and publish it.
- “This channel is disconnected…”: the website channel was disconnected. Create a new chat and paste its new code.
Then the cause is on the website’s side. Go through these in order:
1. The domain is not registered: the site’s domain must be in Website domains (the Behavior tab). The usual slip is a site running on a different domain from the one entered, such as a platform’s temporary address.
2. The site is not on HTTPS: the chat only shows on https:// addresses.
3. The code is not on the page you are viewing: it was pasted into only some pages, or the site change was never saved or published. If the site uses a caching plugin, clear the cache and reload.
4. The site blocks outside scripts: if it sends a Content-Security-Policy, whoever runs the site must allow https://app.repio.io in script-src, connect-src and frame-src.
Tip: A developer can open the browser console (F12) for the quick answer: Repio logs a line starting with [Repio] when the domain is not allowed or the channel has no live agent. To try it on a local machine, add localhost to the domains.
Website conversations work exactly like Facebook and Zalo ones: the AI answers within the agent’s operating hours, hands over to a person when it should, and your team replies straight from the inbox. Replies appear in the visitor’s open chat without a reload.
The AI also knows which page of your site the visitor wrote from (its title and address). Someone asking “how much is it?” on your braces page gets an answer about braces.